Mastering the Dense Character of South-West Australian Timbers
Jarrah and Marri are among the most rewarding timbers available to Australian woodworkers. Jarrah brings deep red-brown colour, weight, and a rich, polished surface, while Marri, botanically known as Corymbia calophylla, combines honey-coloured timber with dramatic dark gum veins. Marri is an iconic tree of south-western Western Australia, growing through areas including the Swan Coastal Plain, the Darling Scarp, and the Jarrah-Marri forests. Its timber is prized in furniture, flooring, cabinetry, and turned work, particularly where its natural character is part of the design. For background on the species and its distinctive timber, see this guide to Marri timber character.
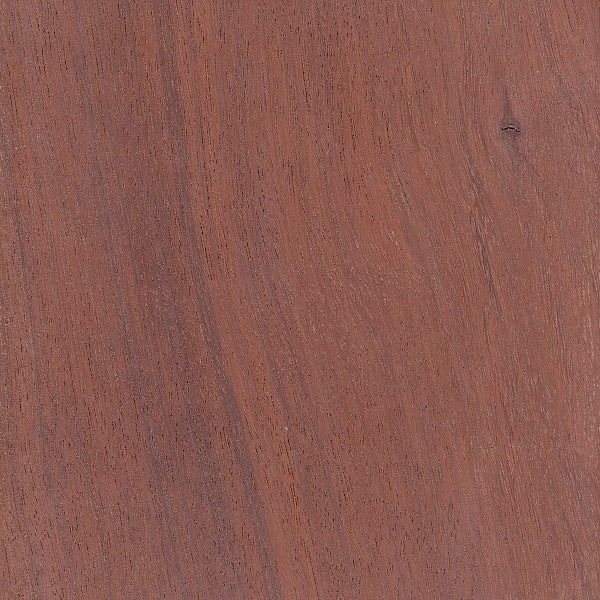
Both species can also expose weaknesses in an unprepared turning routine. Jarrah is dense and can contain enough mineral material, including silica, to dull an edge surprisingly quickly. Its grain may change direction within a few millimetres, so a cut that behaves perfectly on one section can lift fibres on the next. Marri presents a different hazard. Its kino pockets and veins can be brittle, crumbly, or partially detached from the surrounding wood. A heavy cut can shatter an inclusion, produce a sudden catch, or leave a cavity that is larger than expected.
The answer is not to force the gouge harder or to rely on sanding to rescue a rough surface. Clean results come from a proactive sequence that begins before the blank reaches full speed. Inspect the grain, secure vulnerable inclusions, sharpen more often than usual, and keep the bevel supporting the edge throughout the cut. The following workshop checklist establishes the right starting point:
- Confirm that the blank is sound, securely mounted, and free from loose bark or unbonded inclusions.
- Use eye protection, hearing protection, a suitable dust mask or respirator, and a face shield when the work may eject fragments.
- Prepare a genuinely sharp edge before refinement cuts, rather than waiting until the tool begins to burnish the timber.
- Reduce the aggressiveness of the cut as grain direction, density, or gum content changes.
Understanding the Timber Grain and Silica Factor
Jarrah”s difficulty is partly mechanical and partly mineral. Microscopic silica particles within some hardwoods behave like a very fine grinding compound against the cutting edge. The effect is not always visible immediately. A gouge may still produce shavings, yet the edge has already lost the keen, fine apex needed for a clean finishing cut. As that edge rounds over, the tool begins to rub and compress fibres instead of slicing them. The result is a dull grey surface, torn end grain, heat, and increasing pressure at the tool rest.
Interlocked grain adds another layer of trouble. In straight-grained timber, fibres generally run in a predictable direction. In interlocked material, the grain angle oscillates, often forming alternating bands. Cutting downhill through one band can mean cutting uphill into the neighbouring band. A scraper presented squarely may catch the exposed fibre ends and pull them out, leaving stubborn divots. The safest response is to read the surface continuously, alter the direction of the cut where practical, and take lighter passes rather than attempting to flatten everything in one operation.
| Timber | Hardness and feel | Blunting tendency | Primary structural concern |
|---|---|---|---|
| Jarrah | Dense, heavy, and resistant under the tool | High where mineral content and abrasive particles are present | Interlocked grain, hard end grain, and rapid loss of edge keenness |
| Marri | Hard but more variable around gum pockets | Moderate to high, especially during long cuts through dense areas | Brittle kino veins, voids, loose inclusions, and abrupt changes in support |
There is no single hardness figure that predicts exactly how a particular blank will turn. Drying history, growth rate, location within the tree, mineral content, and the condition of the blank all matter. Treat the table as a practical comparison, not a substitute for testing the timber. A short, light cut near the rim will tell you more about the current blank than a general species description. If the shavings become dusty, the surface begins to shine rather than cut, or the tool requires increasing force, stop and sharpen.
Tool Selection and Edge Geometry for Stubborn Fibres
Standard carbon steel is poorly suited to extended work in these timbers, and untreated high-speed steel can lose its advantage sooner than expected. The issue is not that ordinary HSS cannot cut Jarrah or Marri. It can, provided the edge is maintained. The problem is that a marginally dull HSS edge encourages heavier pressure and more scraping, which magnifies tearout and chatter. For longer sessions, cryogenically treated M2 HSS and powdered metallurgy steels offer useful edge retention. A carbide tool can also be effective for roughing and controlled scraping, although its presentation still needs discipline. Carbide is not a cure for poor support or an excuse to push aggressively into changing grain.
A fingernail-ground bowl gouge is a dependable primary tool for this work. A bevel angle in the region of 55 to 60 degrees gives the nose sufficient support for bowl interiors and difficult transitions without leaving the edge too fragile. The exact grind should suit the shape being turned and the operator”s control. A long swept-back wing can shear across broad surfaces, while a more supported nose is safer in tight curves. Keep the flute orientation predictable and ensure that the tool rest is close enough to the work to prevent leverage from building during a cut.
- Use a sharp bowl gouge for shaping and refinement, with the bevel polished enough to move smoothly across the timber.
- Keep a dedicated negative rake scraper available for fragile transitions, end grain, and areas where a gouge cannot be presented safely.
- Use a CBN wheel for frequent touch-ups, removing only enough steel to restore the edge.
- Inspect the burr and bevel after sharpening. A rounded nose or uneven wing will show immediately as chatter or inconsistent cutting.
Regular trips to the CBN wheel are part of the process, not a sign that the tool choice has failed. On abrasive Jarrah, several brief sharpenings are usually better than one long session with a tired edge. Stand securely, use the wheel as intended, avoid overheating the steel, and keep the grinder area clear of loose dust. The refinement pass should begin with a fresh edge because this is when the tool must slice fibres cleanly instead of crushing them.
Securing Marri Kino Veins Before the Gouge Touches Timber
Kino is a natural gum produced by several eucalypt relatives, including Corymbia species. In Marri, it can appear as dark veins, pockets, plates, and irregular filled cavities. Some material is solid and well bonded, while other areas are crystallised, brittle, or separated from the surrounding timber. Under lathe impact, unsupported kino can fracture suddenly. The visible break may look attractive, but the loose fragments can also become projectiles or create a deep void under the cutting edge.
- Mount and inspect the blank at low speed. Mark every visible gum pocket, open crack, and area that sounds hollow when lightly tapped.
- Remove loose fragments by hand or with a controlled pick. Do not assume that a dark surface is fully attached beneath.
- Apply water-thin CA glue to accessible cracks and porous kino. Allow capillary action to draw the adhesive into the pocket rather than flooding the area in one heavy application.
- Let the glue cure fully, then repeat the application if the surface continues to absorb it. Use suitable ventilation and avoid skin contact.
- For deeper voids, use medium CA for smaller repairs or a properly mixed, black-tinted epoxy resin where a larger structural fill is required.
- Turn the first passes gently and reassess the repair once the surrounding surface has opened up.
Thin CA is most useful when it saturates the boundary between timber and gum. It should not be treated as a universal structural repair for a blank that is fundamentally unsound. If a section moves, opens, or throws fragments during inspection, remount or discard it. Medium CA is easier to control in a shallow void, while tinted epoxy can make a broad inclusion a deliberate visual feature. Keep the fill slightly proud where practical, because it can be levelled after curing.
Resin and gum-filled blanks deserve conservative speed settings. Begin well below the maximum speed for the blank diameter, stand out of the line of fire during the initial run, and increase speed only when the blank is demonstrably secure and balanced. A face shield is essential, and a dust extractor should be positioned close to the cut. Do not turn an uncured resin repair. If the adhesive remains flexible, cloudy, or warm, wait longer before returning to the lathe.
Bevel Support and Shear Cuts That Eliminate Tearout
The bevel is the control surface that separates a slicing cut from a destructive scrape. When the bevel rubs steadily behind the edge, it supports the cutting point and limits how deeply the gouge can enter. When the bevel is lifted away, the edge can dive into a dense patch, particularly near end grain or a gum pocket. On interlocked Jarrah, a square scraper often attacks the exposed ends of alternating fibres and plucks them out. The resulting divots are not random bad luck. They are the predictable result of presenting a cutting edge without enough support or with too much force.
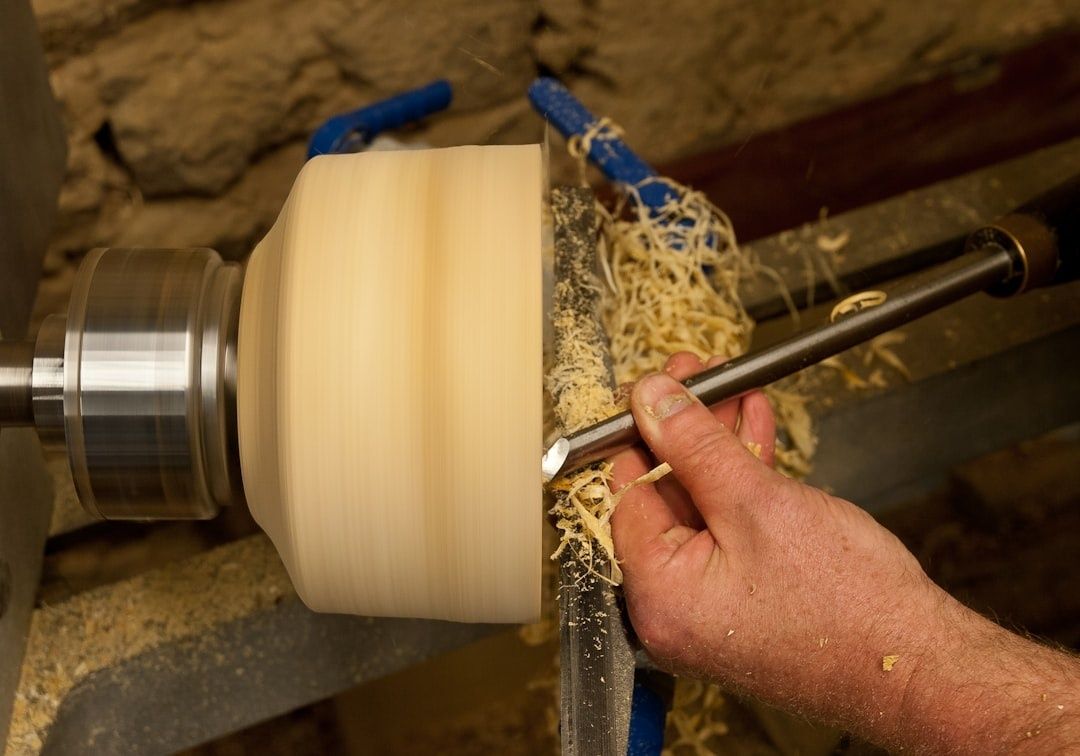
For a refinement pass, bring the bevel into contact first, then raise the handle until the edge begins to cut. Keep the flute partially open and allow the gouge to travel rather than forcing it into the surface. A slicing shear cut is made by rolling the gouge on its side and presenting the edge at roughly 45 degrees to the direction of travel. This changes the cut from a direct push into the fibres to a slicing action, reducing the tendency to lift them. Use the wings carefully, especially inside a bowl, and keep the cut shallow enough that the tool remains easy to control.
- Start the cut on a supported section and move gradually into the changing grain.
- Maintain bevel contact through the transition, but never force the bevel into the timber.
- Reduce the depth of cut when the shavings become short, dusty, or intermittent.
- Use a cleanly sharpened negative rake scraper around high-risk transitions and Marri gum pockets.
- Stop immediately if vibration increases, the tool rest shifts, or an inclusion begins to move.
A negative rake scraper is particularly useful where the surface is too irregular for a confident gouge cut. Its upper and lower bevels help prevent an aggressive bite, but the tool must still be held firmly on the rest and presented with restraint. Keep the burr fresh and controlled, rather than allowing a ragged edge to tear at the surface. Lathe speed should suit diameter, balance, and the severity of the cut. A stable stance, relaxed shoulders, and movement from the legs and hips help maintain consistent pressure as the density changes. If only the arms move, pressure commonly increases at the exact point where the grain becomes difficult.
Workshop Workflow for Sanding and Bringing Out Rich Tones
Sanding should refine a good tool surface, not repair deep tearout. Before reaching for abrasive, stop the lathe and inspect the work under a strong raking light. Rotate the piece by hand and look for torn grain, bruised fibres, ridges, and glossy patches left by rubbing. If a divot catches a fingernail, return to the gouge or scraper with a fresh edge. Sanding across a badly torn area often rounds its edges while leaving the depression intact, producing a surface that looks acceptable in one light and poor in another.
- Begin around 120 grit only when the tool surface is sound enough to justify abrasive work.
- Progress through 150, 180, 240, 320, and 400 grit as the timber and finish require. Do not skip grits when removing visible scratches.
- Use power sanding disks at low lathe speeds, keeping the abrasive moving to avoid heat checking and uneven grooves.
- Vacuum dust between grits rather than allowing loose red Jarrah dust to remain on pale Marri sapwood.
- Inspect the surface with the lathe stopped, then apply the finish sparingly and evenly.
Jarrah dust can stain nearby pale Marri areas, especially when it is worked into open pores or gum boundaries. Use extraction close to the sanding point, clean the piece between grits, and keep separate cloths for dark and light components. A hard-wax oil or another penetrative finish can deepen Jarrah”s colour and reveal chatoyancy as the viewing angle changes. On Marri, it can also emphasise the contrast between honey-coloured fibres and dark kino, while helping protect exposed, stabilised veins. Always test the finish on an offcut, because some products darken gum dramatically or leave a sheen that hides surface defects.
Transforming Challenging WA Timber into Workshop Masterpieces
Successful turning in Jarrah and Marri rests on three habits. First, treat sharpness as a continuing requirement, especially where abrasive mineral content can dull the edge without warning. Second, stabilise Marri”s kino pockets before the gouge begins serious work, using thin CA to penetrate sound cracks and appropriate fills for deeper voids. Third, keep the bevel supporting the edge and use a controlled shear cut instead of attacking interlocked grain with a blunt or unsupported scraper.
These timbers reward attention because their difficulties are also their visual strengths. Interlocked grain creates movement and chatoyancy. Marri”s dark gum veins turn irregularity into a natural pattern, while small voids and colour shifts can give a bowl or platter an identity that uniform timber cannot provide. Slow the cut when the material changes, read the grain from the surface rather than relying on habit, and allow the tool to make the cut instead of using force. With disciplined sharpening, sound stabilisation, and steady bevel control, tough West Australian hardwoods can leave the lathe with the character intact and the surface clean.